A proper bike fit improves comfort, prevents injury, and makes you more efficient. While a professional fit is ideal, this guide shows you how to achieve a solid, neutral position at home using simple tools and clear steps.
It’s not a one-size-fits-all solution, but it will get you close and give you a strong foundation to build from as your riding evolves.
Tools you will need:
- Stationary trainer (turbo)
- Front wheel block
- 4-foot spirit level (or tape measure)
- Metric Allen keys
- Felt-tip marker or stickers
- A couple of saddles to test
- Your usual riding kit and shorts
Initial setup
The best way to achieve an accurate setup starts with getting the bike stationary, stable, level, and vertically straight (not leaning to either side when you sit on it).
Steps:
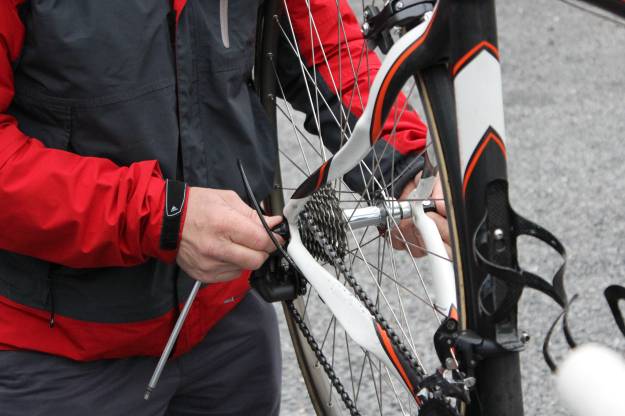
- Pump tyres to recommended pressure.
- Replace the rear skewer with the one supplied with your trainer to ensure the bike stays upright and secure.
- Mount the bike in the trainer per manufacturer instructions.
- Place a front wheel block under the front tyre.
- Use a 4-foot spirit level from the rear axle (fixed in the trainer) to the front axle. Adjust front wheel height until both axles are level.
- Visually inspect that the bike is vertical - not leaning to one side.
- Adjust saddle angle so the front two-thirds are level. For shaped or anatomical saddles, this may mean the rear of the saddle sits slightly higher. This supports your sit bones and reduces pressure on soft tissue.
Note: Saddle angle is partly personal preference.
Handlebar and stem setup
- Rotate the handlebars for neutral wrist positioning. For drop bars, the hoods should angle slightly upward. Check that brake levers are easy to reach from both the hoods and drops.
- Set the stem angled downward to start. Most stems range from ±6° to ±20°.
- If using headset spacers, place all but one below the stem. Put the last one above the stem, then tighten the headset cap to manufacturer specs.
- For riders struggling with saddle pressure, rotating the bars slightly upward can help redistribute weight.
Kit up
Put on your normal cycling kit and shoes. What you wear affects your position, so match your setup to your regular riding conditions.
Adjusting contact points
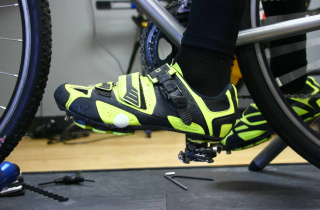
1. Foot position
Set cleats so the ball of your foot aligns with the pedal spindle. This is a neutral starting position. For help, refer to our cleat setup video. Make sure the shoes point straight forward and cleats are tightened to spec.
2. Saddle height
- Start with the saddle centered on the rails.
- Set the post height low to begin with.
- Mount the bike and sit squarely on the saddle.
- Drop both feet down with knees fully extended.
- Raise the saddle until your heel just brushes the pedal at the bottom of the stroke.
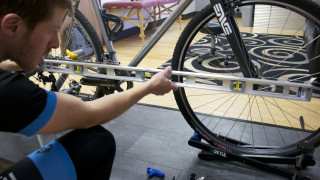
3. Handlebar height and reach
- Set height before reach. Use the 4-foot level from the saddle midpoint out over the handlebars.
Saddle-to-bar drop guide:
- Racing road bike: Top of bars ~8 cm (a fist) below saddle
- Performance road: ~5–6 cm below
- Recreational road: Level or slightly below
- Cross-country MTB: Grips should not be above saddle midpoint
- Aggressive XC MTB: 2–5 cm drop between saddle and grips
If you can’t get the bars high enough, flip the stem upward for more height.
4. Fine-tuning
- Mount the bike and ride in all handlebar positions.
- Adjust stem length and bar height based on comfort and control.
- Handlebar width matters - especially for smaller riders or women. Your bars should roughly match shoulder width. Narrower bars can reduce strain and improve control.
- Consider ergonomically shaped bars and adjust brake hood position if reach feels awkward.
- For those feeling pressure at the saddle, slightly rotating bars upward can help redistribute weight.
- Don’t change too much at once. Try one adjustment at a time and give it a week of riding to see how it feels before making further changes.
These adjustments are designed to get you close to an ideal position, whether you’re riding road or mountain. Be patient - your body needs time to adapt. Avoid changing multiple things at once, and don’t tweak your setup more than once a week. If discomfort persists or you have injury concerns, a professional fit is always worth considering.
If you'd rather leave your bike fit to the experts and get the professional approach, there are services across the UK that you can access.
Recently added to the Member Rewards Hub is a 10% discount with The Bike Fitters, meaning you can save (on your first bike fit only). No matter your riding style, The Bike Fitters can visit you at home to get you dialled for a super efficient set-up.