Knowledge Level: Advanced
No matter how well you clean, lubricate and look after your chain, it will eventually wear out and need replacing. If you don't change it early enough the worn and elongated chain rides up higher on the chain-rings and sprockets, accelerating their wear and leaving you needing to replace all three. It’s best to monitor chain wear and to replace it before this happens.
Follow these tips from the Great Britain Cycling Team mechanics, on how to carry out these maintenance tasks.
Measuring the chain stretch
First you need to monitor the extent of wear in your chain by measuring the chain stretch. This isn't actually stretch as such but wear to the chain pins and internal surface of the roller which makes the chain longer, hence the term stretch. You'll need a chain checker to do this but they don't cost much and most your local bike shops will keep them in stock. The simplest ones slot into the chain and measure 0.75% extension on one side (over the nominal original length) and 1.0% when flipped over to the other side. 0.75% extension means your chain is showing signs of wear and, at that point, you should check out your local bike shop or the internet for a replacement. 1.0% means you need to change your chain for a new one or you'll quickly find your chain-rings and cassette will wear out too.
What you'll need
Now you've established your old chain is worn out, you have a new chain in your hand but you also want to change your cassette to one with larger sprockets, as you have a cycling holiday coming up in the Pyrenees or Alps. To take off the old chain and cassette, you’ll need the following tools.
- Chain tool (for the width of chain appropriate to your drive-train) such as the Park Tool CT-3;
- Cassette lock-ring remover (Park FR5 fits Shimano and SRAM cassettes, FR11 fits Campagnolo);
- Large adjustable spanner
- Chain-whip
Once you've got everything lined up, it's worth checking that your new chain has a spare pin or removable link to connect it into a loop.
Remove the old chain
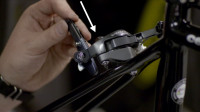
Use your chain tool to drive out one of the chain-pins and split the chain. While you're there check the condition of the chain-rings for signs of wear.
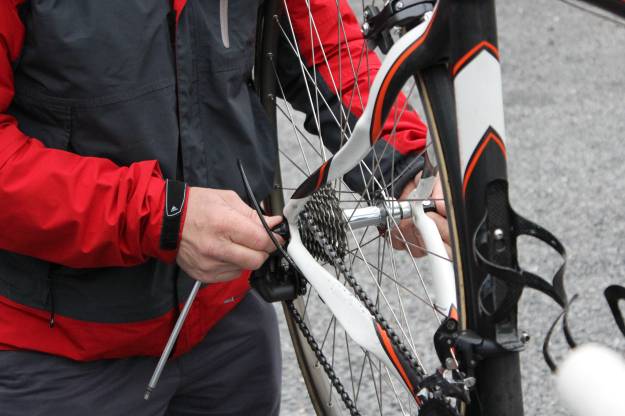
Remove your old cassette
Fit your cassette lock-ring remover into the cassette Use the chain whip to secure the cassette (left hand) to ensure it doesn't rotate as you use the large adjustable spanner (right hand) to undo the lock-ring. Take care that neither tool slips off. If you don’t have a chain whip, you can use your old chain you’ve just removed or any old chain on the top sprocket. Remove the lock-ring, sprockets and spacers and secure them together in the right order, a zip-tie is handy for this. Note that some wheels require a spacer behind the cassette - e.g. Mavic supply one for use with Shimano cassettes and reuse it with the new cassette.
Fit new cassette and sprockets, spacers and lock-ring
Tighten with the cassette lock-ring tool - typically 40Nm - that's roughly a 4kg weight at the end of a 1m long spanner so about 12- 13kg (or 28-29lb in old money) worth of force on the end of your 12" adjustable spanner.
Establish the correct chain length
The chain as supplied will likely be too long so you need to establish how much it needs shortening. Some chains also have a right and wrong orientation and need to have one particular set of plates facing outward. Replace the rear wheel and thread the chain through the rear mech, round the smallest sprocket and the chain-ring. Pull the ends together then move up a full link at a time until there is no sag in the chain. Note the number of links to remove but before you go ahead check the chain is on the largest sprocket and chain-ring. The chain should maintain an ‘S' bend through the rear mech. If it doesn't your rear mech doesn't have enough capacity for the range of gear ratios you have and you should consult your local bike shop (or bike expert) for advice. Shorten your chain by the required number of links ensuring that you leave the ends of chain required for your connecting method.
Connect the chain
Shimano and Campagnolo chains have a special pin which you push into the chain with the appropriate chain tool connecting a pair of outer plates to a roller. Make sure the pin protrudes equally both sides of the plates and the link is not stiff. Once you’ve put the pin through, you can use the back end of the tool to snap the end of the pin off. SRAM chains have a connecting link which consists of two pin/plates which join together a pair of rollers. No tools are required and they're very handy to have one your saddle pack. Make sure the connecting link clicks locked. Neither connector should be re-used and should be discarded with the worn out chain.
Hopefully these tips will mean you can take on the job of replacing your chain and cassette without any hassle. The key point to remember is to keep on top of monitoring chain stretch, which will help you avoid those expensive full drive train replacements in the future.