Knowledge Level: Intermediate
Tubeless set-ups deliver a number of benefits whether you ride on the trails or the road, but many riders are put off by tales of frustration caused by messy sealant and tyres that stubbornly refuse to seat and seal. By following a few simple tips you can make your transition to tubeless pain free.
Research
Doing some research into tried and tested tyre and rim combinations can save a lot of time and frustration. Browse some internet forums, look at manufacturers' websites and speak to other riders. Generally tubeless specific or UST rims combined with tubeless ready or UST tyres will be easiest to set-up. Conversions and non-tubeless tyres tend to be trickier. Don’t forget, if it is a road tubeless set-up, you have to use specifically designed tyres and rims.
Inflate overnight with tubes
Almost all tyres will be sold folded and, having been stored in this way for a while, the creases and kinks can prevent easy seating and sealing, this also applies to TLR and UST tyres. Mount the tyre, inflate using a tube to the maximum recommended pressure and leave for 12-24 hours.
Check around the valve
Once you have mounted both beads of the tyre, double check that they are seated either side of the valve. If not, when you try to inflate the tyre, air will rapidly leak from here. Work around the tyre and, by gently squeezing it from the top, try to encourage the beads up and away from the central channel.
Tape it
An extra layer of tape can raise the central channel of the rim and make it easier for the beads to seat. If you are regularly having problems seating tyres, this can often provide a solution.
Get soapy
Some soapy water provides lubrication and will make it far easier for the tyre bead to pop into place. Mix some up and apply liberally using a plant sprayer.
Four hands are better than two
Seating tubeless tyres often requires some fairly vigorous two handed pumping and it can also help to squeeze and wriggle the tyre to encourage seating. This is far easier if you ask a friend to help you with the task.
Remove the valve core
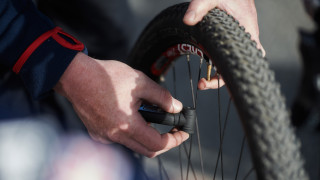
Most valve cores designed to be used with tubeless systems allow you to remove the valve cores. Removing the valve core means you can greatly increase the volume of air going into the tyre making seating easier. Use snipe nosed pliers or ask at your local bike shop for one of the small plastic tools designed for the job.
CO2 can be your friend
A CO2 canister can provide the instant high volume blast that is needed to pop a tyre bead into place. However don’t use one if you have already introduced sealant into the system as the ultra-low temperature and the gas can cause some sealants to instantly cure.
Compressor options
Access to a compressor can certainly make setting up tubeless tyres easier but, if you follow all of these tips, it shouldn’t be necessary. If you know that a certain tyre and rim combination can only be achieved with a compressor, do you really want to take that set-up out onto the trails or to a race? Portable systems that use a track pump to compress a reservoir that then releases a blast of air are being developed and should be available soon.
Seat before sealant
Always get the tyre seated before adding sealant. The sealant does not aid the seating process and, if the rim and tyre combination you are using does prove troublesome, taking steps, such as adding another wrap of rim tape or inflating overnight with tubes, to solve the problem, if far less messy if you haven’t already added sealant. Once the tyre is seated and has been inflated, you can confidently deflate it to add sealant knowing that it will pop up again.
The bang is good
A tyre seating is often accompanied by a fairly loud pop or bang that can be disconcerting if you have never experienced it before. Don’t worry, this noise is a good indicator that the tyre is properly seated.
Buy a syringe
You can unseat a section of the bead to add the sealant but with tight tyres and temperamental systems, once you have got a tyre seated, do you really want to do this? A syringe will allow you to inject the sealant in via the valve. Some sealants that contain solid particles to aid puncture sealing will require the valve core to be removed but others can be injected through it.
Grab a couple of boxes
If you are not using UST tyres, most air loss will be through the sidewalls. Once you have got your tyre seated and the sealant in, pump it up and then shake it from side to side while rotating it. Then, lay it horizontally on top of an empty cardboard box. Leave for a few minutes, top up the air, shake some more and lay to down again with the opposite side down. This allows the sealant to come into direct contact with and seal the sidewalls. Repeat this process until the tyre is holding pressure.


